.NET Core continues Microsoft’s shift towards a more open development philosophy. It is open-source and cross-platform. With a little bit of setup, you can get a .NET Core web app running on Linux-powered Heroku. This guide will walk you through it.
This guide is catered for development on Windows, even though the resulting web app runs on Linux via Heroku. .NET Core (the framework) is cross-platform, but Visual Studio (the IDE) is not… yet. However, there are solutions for running Visual Studio on Mac.

Prerequisites
Make sure you have all of the following prerequisites ready to go.
- Heroku account created (sign up here).
- Heroku CLI installed (download here).
- Git installed (download here).
- Visual Studio 2015 (the free community version is fine) and .NET Core VS 2015 Tooling installed (download both here).
- NuGet installed (download here).
Create the Solution
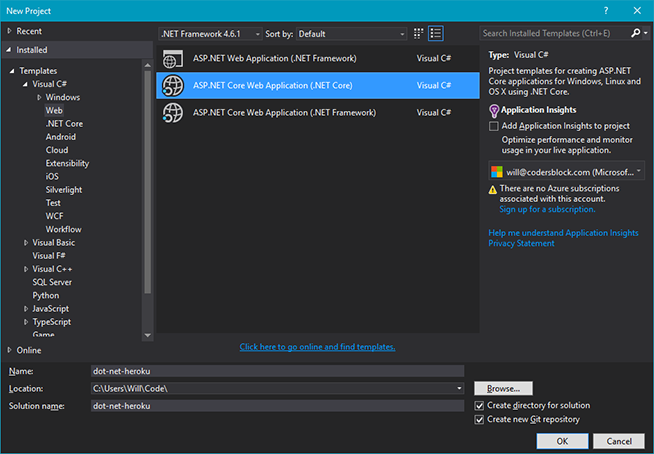
Fire up Visual Studio, then go to File > New > Project.
Navigate to Installed > Templates > Visual C# (or Visual Basic, if that’s your thing) > Web. Select ASP.NET Core Web Application (.NET Core). Pick your Name (I’m using “dot-net-heroku” here) and set Location to the directory you want the solution directory to be created within. Check both Create directory for solution and Create new Git repository. Click OK to proceed.
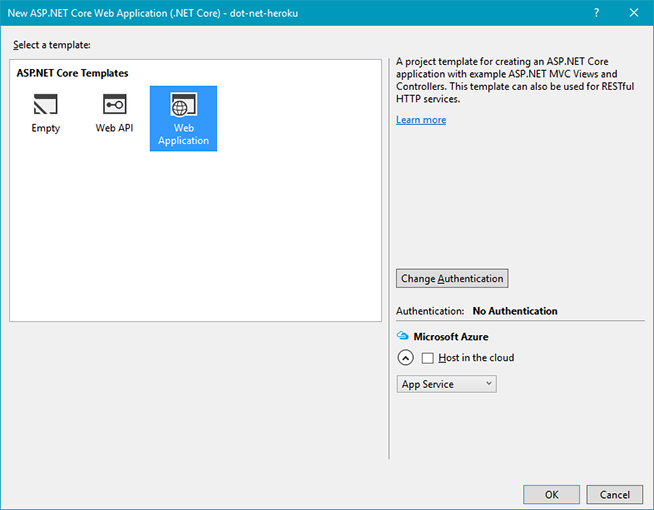
On the next screen, select Web Application (Web API works too, if that’s what you want). Click OK.
At this point you have a brand new solution. We’ll need to tweak it a bit, though.
Modify the Solution
Still in Visual Studio, go to View > Other Windows > Package Manager Console. This will give you a console with a PM> prompt. Execute the following command.
Install-Package Microsoft.Extensions.Configuration.CommandLineNow open up Program.cs for some edits. Near the top, add the following using directive.
using Microsoft.Extensions.Configuration;Then update the Main() function as seen below.
public static void Main(string[] args)
{
  var config = new ConfigurationBuilder().AddCommandLine(args).Build();
  var host = new WebHostBuilder()
    .UseKestrel()
    .UseContentRoot(Directory.GetCurrentDirectory())
    .UseConfiguration(config)
    .UseIISIntegration()
    .UseStartup<Startup>()
    .Build();

  host.Run();
}
Your Program.cs should look like mine. With that, the solution is ready for deployment. Now to take care of things on the Heroku side.
Create the Heroku App
Open up your command line terminal of choice and navigate to the solution directory. Make sure you’re logged into Heroku.
heroku loginCreate the Heroku app with whatever name you want.
heroku create your-app-nameNow to add the buildpack. I’ve had the best results with noliar’s fork, so that’s what I’m using here.
heroku buildpacks:set http://github.com/noliar/dotnet-buildpack.gitFinally, set up Git to deploy to Heroku and push.
heroku git:remote -a your-app-name
git commit -am "Setup for Heroku"
git push heroku master
Give the deployment some time to finish up, and there you have it. Go to http://your-app-name.herokuapp.com/ (with your app name, obviously) and you’ll see your .NET web app running on Heroku. It should look like mine.
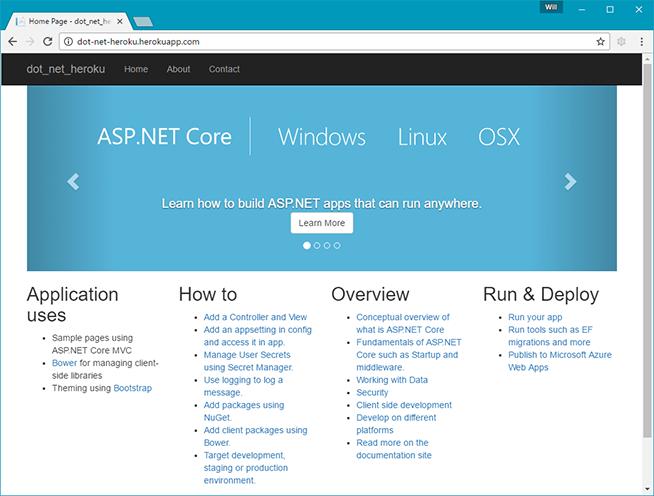
What you’re seeing is the default index page for the template we used. At this point you’re ready to delete the default pages and start working on your own.
Bonus: Hooking up to GitHub
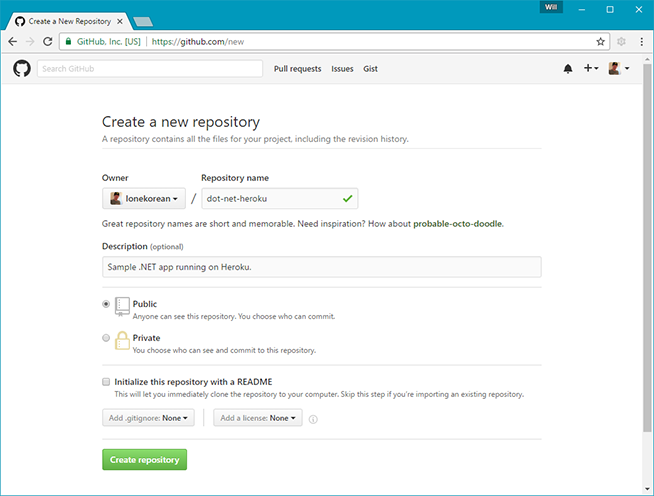
You’ve got your .NET web app inside a local Git repo, but maybe now you want to add it to GitHub. Start by creating a new repo. To avoid conflicts, don’t initialize with the readme, license, or .gitignore files (you can add these later).
Back in your terminal, run these commands. Replace “your-username” and “your-repo-name” as appropriate.
git remote add origin https://github.com/your-username/your-repo-name.git
git push -u origin master
If you get a pop-up about security credentials, cancel out of it and enter your credentials in the terminal.
If the terminal won’t accept your credentials, it may be because, like me, you have 2-factor authentication enabled. In this case, create a personal access token with repo access and use it in place of your password.
Closing Remarks
It’s great seeing .NET break out of its Windows-only ecosystem to embrace the more open and cross-platform community of modern web development. Also, big thanks to noliar and all the other contributors for maintaining the .NET buildpack I’m using in this guide.