I recently gave a talk at RevolutionConf about writing a motion detecting web app with JavaScript. This is basically that talk, but in blog form. Live demos and all the source code are available at the end of this article.
The Premise
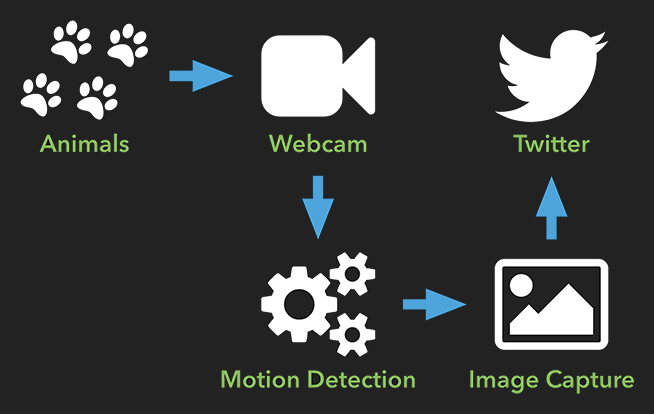
I wanted to see what my pets do when I’m away. But I didn’t want a continuous live stream, since that would be pretty boring (they sleep a lot). Instead, I decided to build something that would watch for motion, take a snapshot of anything that happens, then upload the snapshot to Twitter for remote viewing.
Just for kicks, I decided to do this as a web app, all in JavaScript.
Accessing the Webcam
The first step is to access the webcam. This is actually really easy with WebRTC, which is natively supported by modern browsers… unless your browser is Safari. Boo. Another wrinkle is that WebRTC has some syntax differences from browser to browser, but the adapter.js shim will fix that for you.
Anyway, to grab a stream from a webcam, start with a <video> element in your HTML.
<video id="video" autoplay></video>Then add a bit of JavaScript.
var constraints = {
  audio: false,
  video: { width: 640, height: 480 }
};
navigator.mediaDevices.getUserMedia(constraints)
  .then(success)
  .catch(error);

function success(stream) {
  var video = document.getElementById('video');
  video.srcObject = stream;
}

function error(error) {
  console.log(error);
}
This will attempt to grab a 640px by 480px stream from an attached webcam. Users will be prompted to permit access, but assuming they do, the stream will be displayed in the <video> element on the page. Check out this quick demo to see it in action.
Grabbing Still Frames
We need to capture still frames from the streaming video so that we can do motion detection (more on this later) and potentially upload them as images to Twitter. I settled on an interval of 100ms between captures, which is 10 frames per second.
var video = document.getElementById('video');

var canvas = document.createElement('canvas');
canvas.width = 640;
canvas.height = 480;
var context = canvas.getContext('2d');

setInterval(capture, 100);

function capture() {
  context.drawImage(video, 0, 0, 640, 480);

  // do other stuff
}
We start by grabbing the <video> element with the stream on it from the page. Then a <canvas> element is created in memory, though you could also have it on the page for display.
A simple setInterval() allows us to capture a new still frame every 100ms. Each capture is drawn onto the <canvas> element by calling drawImage() and passing in the <video> element. It’s smart enough to just draw whatever is visible on the <video> element at that very moment.
Once something is drawn on a <canvas>, you can save it off as an encoded image string. We can use this string later when uploading to Twitter.
var dataURL = canvas.toDataURL();Of course, we don’t want to save and upload every still frame we capture, just the ones with motion. Fortunately, <canvas> gives us the tools to detect motion.
Diffing
So, what exactly is “motion”? A video (such as a stream from a webcam) is just a bunch of still images shown in rapid succession. Movement is perceived when there are changes between these images. So to check if motion has occurred between two frames of a video, we check for differences between the two images, also known as “diffing”.
We’ve already covered how to draw images onto a <canvas> from a <video>. By default, drawing something onto a <canvas> just covers up whatever was already there, but this can be changed to show you the differences instead.
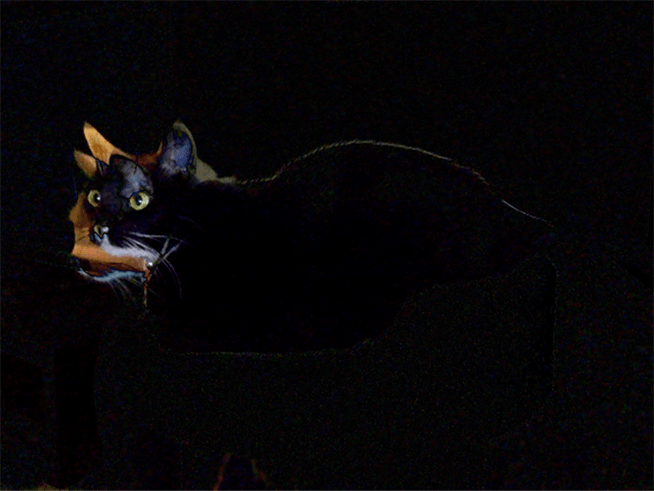
context.globalCompositeOperation = 'difference';Here’s an example of an image drawn on top of another with the aforementioned difference setting. Dark pixels indicate areas with little to no motion. Brighter pixels show areas where something moved (in this case, mostly my cat’s head).
Scoring
We can see that motion happened on the <canvas>, but how do we turn this into data that we can programmatically evaluate or “score” for motion? The answer is getImageData(). This function returns an ImageData object that has a data property. This property is a long array of numbers, with every chunk of 4 numbers representing a single pixel (red, green, blue, and transparency).
Remember, when diffing, the brighter pixels indicate more difference which means more motion. So the higher the combined red, green, and blue values of a pixel, the more motion that occurred in that pixel. By scoring every pixel like this, we can determine if values are significant enough to consider a capture as having motion.
Here’s a quick algorithm to do this.
var imageScore = 0;

for (var i = 0; i < imageData.data.length; i += 4) {
  var r = imageData.data[i] / 3;
  var g = imageData.data[i + 1] / 3;
  var b = imageData.data[i + 2] / 3;
  var pixelScore = r + g + b;

  if (pixelScore >= PIXEL_SCORE_THRESHOLD) {
    imageScore++;
  }
}

if (imageScore >= IMAGE_SCORE_THRESHOLD) {
  // we have motion!
}
Post-Processing the Diff
Not only can we read pixel data from ImageData.data, we can also write adjustments back to it. By tweaking the pixel data this way and then redrawing it with putImageData(), you can essentially do post-processing on the diff image.
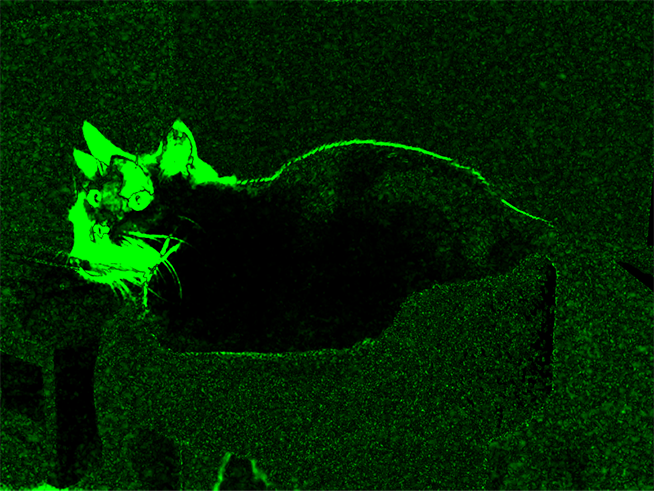
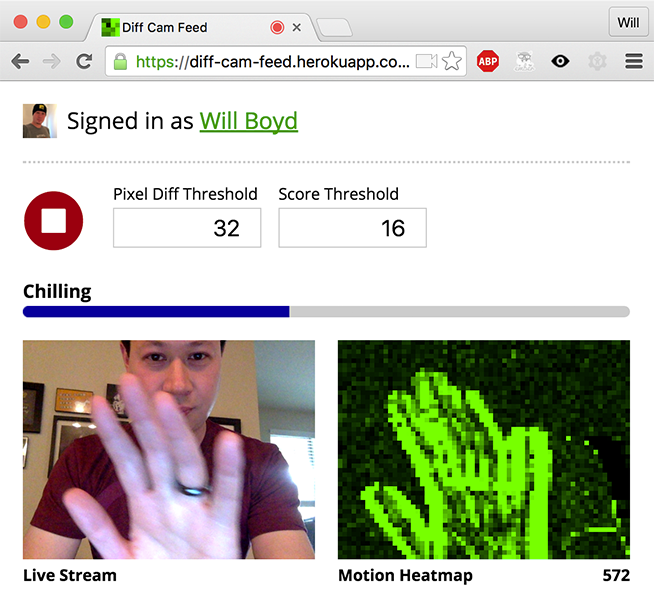
I like doing this to make the diff image monochrome green (set red and blue values to 0) and then amplifying the brightness (multiply green values by some constant). This makes it really easy to see where motion is. It also makes it easier to see the ambient visual noise, in case you need to tweak some threshold values to discern between noise and actual motion.
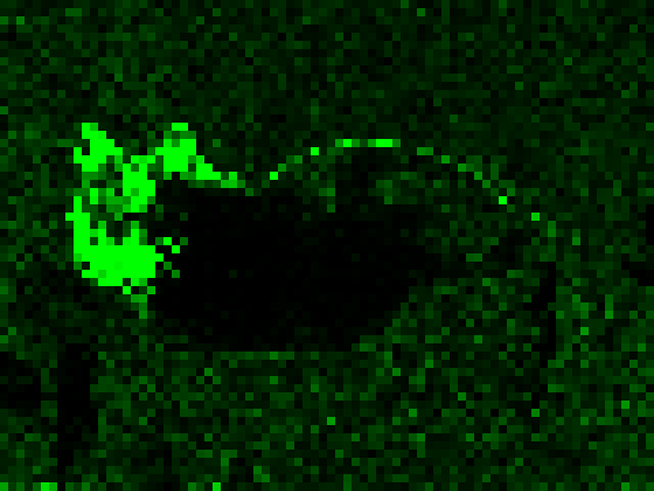
On top of that, I like to downscale the diff image to 10% of its original width and height. Even a modest 640px by 480px image is a lot of data (307,200 pixels!) to churn through, so downscaling helps lighten the load. Sure, the image becomes super pixelated, but it’s still plenty enough for the purposes of motion detection.
Throttling
One important thing I haven’t covered is throttling. Without throttling, any continuous motion will cause rapid-fire captures to be saved and uploaded to Twitter, 10 times a second. That’s no good.
There are a couple ways to handle this. This is what I went with.
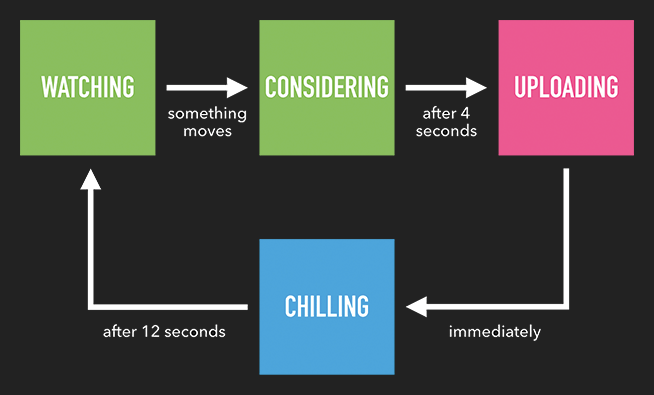
The important thing is the “chilling” state, which is just a cooldown timer. I also added a “considering” state, during which captures can occur continuously, but only the highest scoring capture is kept and uploaded. Hopefully, the highest scoring capture is the most entertaining capture, since it has the most motion.
The Back-End
Even though all the motion detection is done client-side, we still need a back-end since we’re using the Twitter API (can’t have our secret Twitter API key revealed on the front-end).
I won’t go into specifics about the back-end, since it’s not directly related to motion detection. I’ll just mention that I wrote it in node.js, so it still satisfies my “all in JavaScript” goal.
The Results
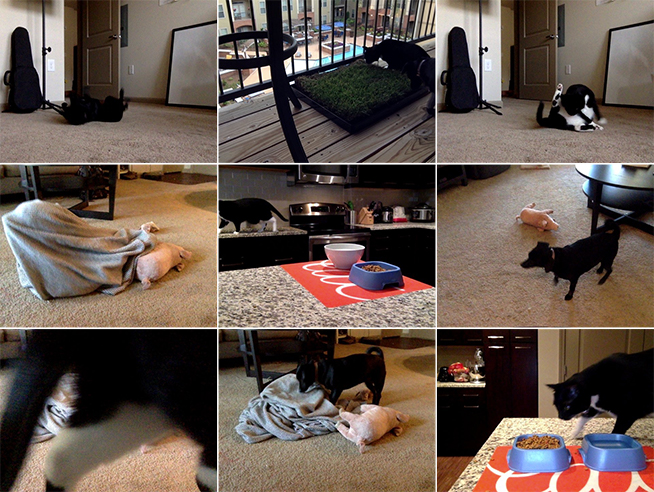
You can check out the finished web app for yourself. I call it Diff Cam Feed. It’ll ask you to sign in with Twitter so it can upload to your feed (that’s all it does, nothing shady, I promise).
I set it up on my laptop for a few trial runs around my apartment. Results were decent. Just my pets, doing pet things.
It also works fine on a Raspberry Pi running Raspbian, after installing UV4L.

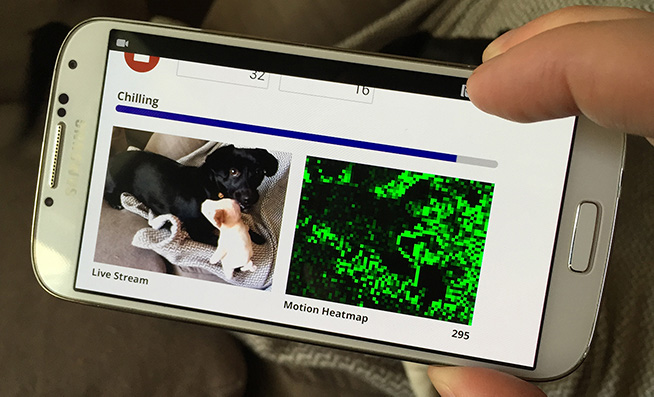
Then I tried it on an old Android phone I had lying around (Samsung Galaxy S4). It works great, as long as you run it in Firefox. For some reason, Chrome on Android dies after a few minutes.
Conclusion
Overall, this turned out to be a fun side project. The motion detection looks really cool and isn’t very difficult to do. I made it all open source, so you can check out the code in this GitHub repo.
It’s not hard to imagine other uses for motion detection in a web app. If this interests you, then check out Diff Cam Engine. It wraps up a lot of motion detection stuff for you, so you can kickstart your own project.
Lastly, I’ve set up a website with several demos illustrating the concepts I talked about. Feel free to play around with them and check out the code.
Thanks for reading!